
Sora 2 Prompt Engineering
The Advanced Reference Guide
Published: 10.10.2025
Estimated reading time: 50 minutes
Introduction
Sora 2 is OpenAI’s flagship text-to-video model, capable of generating short films complete with synchronized audio and realistic motion from textual prompts. Unlike earlier generative models that only produced still images or silent clips, Sora 2 treats a prompt like a miniature movie scene – complete with characters, actions, camera work, lighting, and sound. Prompt engineers working with Sora 2 must therefore think more like film directors and cinematographers. This reference guide provides a comprehensive look at advanced prompting techniques for Sora 2, empowering you to craft prompts that maximize the model’s creative and technical performance. We will explore strategies for controlling temporal sequences, guiding spatial composition, managing frames and transitions, chaining prompts for longer narratives, leveraging latent inputs like image references, and ensuring consistent animation quality. Throughout, we highlight what’s new in Sora 2 versus its predecessors, and offer tips to troubleshoot undesired outputs. The aim is to equip experienced prompt engineers with a deep, structured understanding of how to harness Sora 2’s full potential for high-quality, controllable video generation.
Sora 2 vs. Earlier Sora Versions: What’s New

Sora 2 introduces significant improvements over the original Sora (released in early 2024), both in capabilities and in how prompts are interpreted. Key differences include:
Temporal Consistency and Multi-Shot Support: Sora 2 can follow intricate instructions spanning multiple shots while persisting the same characters and world state across cuts. Earlier versions struggled with continuity – for example, keeping a character’s appearance consistent shot-to-shot or maintaining object positions. Sora 2 is explicitly designed for better continuity, so a prompt describing sequential actions (e.g. a person entering a room, walking down a hall, then picking up an object) is more likely to yield a coherent sequence without sudden scene resets or character changes.
Spatial and Physical Realism: The new model exhibits a stronger grasp of physics and spatial logic. Sora 1 often produced surreal or erroneous behavior (an object might “teleport” to fulfill an outcome). Sora 2 is more grounded – it attempts plausible outcomes when following your prompt. If a ball is thrown and misses a hoop, it now bounces off the rim instead of magically going in. The model better respects object permanence and the laws of physics, so prompts describing physical interactions (water splashing, vehicles braking, etc.) result in more realistic motion. This means prompt engineers can and should specify materials, forces, and spatial relationships in detail – Sora 2 will more reliably honor them.
Enhanced Controllability: Sora 2 responds to more fine-grained directions than its predecessor. It excels at “film grammar” – you can specify camera angles, lens types, movements, and it will attempt to match those cinematic instructions. In Sora 1, many of these cues might have been ignored or led to unstable output. In Sora 2, prompts that read like a director’s shot list (with explicit framing, focus, lighting, etc.) tend to produce closer-to-intended results. This version also introduces a storyboard mode in the Sora app, allowing creators to lay out individual shots or timestamps, reflecting an overall push for frame-level control.
Audio and Dialogue Generation: A major addition in Sora 2 is native audio synthesis. It can generate synchronized dialogue lines, sound effects, and ambient background audio in response to your prompt. Earlier Sora outputs were silent (requiring external sound design). Now you can include dialogue (with character labels) and describe sounds or music in the prompt, and Sora 2 will incorporate them into the video. This requires prompt precision – specifying short lines of speech and identifying the speaker – so the model knows how to time the audio within the clip.
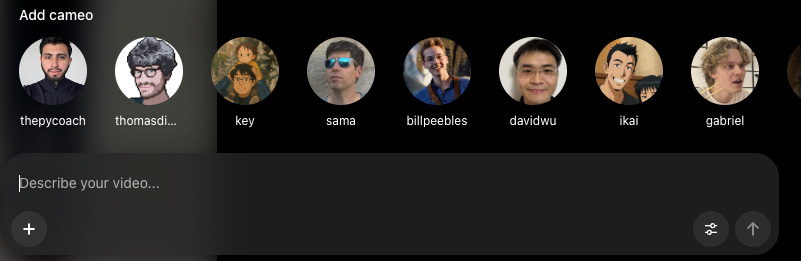
Cameos and Visual Conditioning: Sora 2 introduces a “cameo” feature that allows injection of real-world elements (like a person’s likeness or a specific object) into the generated video. By providing a reference video or image of a person, the model can render that individual (voice and appearance) inside the AI-generated scene. This was not possible in Sora 1. From a prompt perspective, cameo integration means you can anchor characters strongly – essentially guiding the model’s latent space with an actual example of the subject. In general, Sora 2 accepts an image input as a visual anchor for a scene’s first frame, which earlier versions did not support. This gives prompt engineers a powerful tool for style and content control, as we’ll detail later.
Higher Fidelity and Format Options: The second-generation model supports higher resolutions and longer durations than the original. For example, Sora 2 (especially the Pro tier) offers resolutions like 1280×720 and even up to ~1792×1024 for vertical format, whereas Sora 1 was limited to lower res. Clip lengths up to about 12 seconds (and experimentally beyond, ~20s in some previews) are now possible, though very long clips still push the limits of consistency. This expanded output range means you might string together multiple scenes or cover a more complex action within one prompt, but it also means managing continuity and detail over time is more important.
Reliability and Safety Improvements: Sora 2 has an improved alignment and safety layer, reducing certain undesired outputs (e.g. fewer distorted faces or out-of-control scenes). It also watermarks outputs for provenance. While these are not “features” you prompt for, they influence prompting strategy: for instance, attempts to force the model into disallowed content will be filtered, and using the proper channels (like the cameo opt-in) is necessary to include real people. Generally, Sora 2 is more strict about not generating legible text or trademarked logos in scenes, which means you should explicitly tell it to avoid things like “any recognizable brand signage” if you want to be safe – we cover such negations in troubleshooting.
In summary, Sora 2 is a more powerful, film-aware AI generator. It gives prompt engineers a wider toolkit (audio, multi-shot, image anchors) and expects more “directorial” precision in return. With these differences in mind, we now delve into advanced prompting strategies specific to Sora 2.
Advanced Prompt Design in Sora 2
Advanced prompt design for Sora 2 involves describing a scene in cinematic terms. In the example above, various prompt elements are illustrated – from camera lenses (e.g. 24 mm wide vs. 85 mm telephoto) and movements (like a crane lift or a dolly push) to physical effects (wind direction, bouncing motion) and even audio cues. Sora 2 responds well when prompts explicitly encode such details, effectively guiding the model’s “eye” and “ear” for the virtual camera.

To write effective Sora 2 prompts, think of constructing a shot list or storyboard in text form. An advanced prompt is typically structured into multiple layers of information, each targeting a different aspect of the desired video:
Setting and Atmosphere: Describe where and when the scene takes place, including time of day, weather, era or context, and overall atmosphere. This grounds the model in a consistent environment. For example: “Neon-lit alley at night in light drizzle, puddles reflecting signs” sets a clear stage.
Subject and Action: Specify who or what is in focus, and exactly what they are doing. Break complex actions into smaller beats if needed. Rather than a vague “man moves through scene,” you might say “A courier in a red jacket jogs three steps and stops at a door, breathing heavily.” Concrete, visible actions (footsteps, gestures, picking up an object) help the model understand the temporal progression.
Camera and Framing: Treat the prompt like instructions to a camera crew. Include the shot type (wide, medium, close-up), camera angle (eye-level, low angle, aerial, etc.), and movement if any (e.g. “handheld tracking shot from behind,” “slow dolly in,” “static tripod shot”). Mention lens focal length or style if relevant – “35 mm lens at f/2.8 for shallow depth of field” – to control field of view and focus. These details influence how the scene is composed in the frame, from what perspective, and with what depth.
Lighting and Color: Describe the lighting sources, direction, and intensity, as well as color palette or grading style. Sora 2 pays close attention to lighting cues, which also affect the mood. For instance: “soft key light coming through a window from the left, with a cool blue fill from street neon” or “warm golden hour sunlight with long shadows”. Naming a few dominant colors or materials (e.g. “palette of amber and teal, with dark walnut wood tones”) can help the model maintain color consistency across the clip.
Physics and Environment Details: To leverage Sora 2’s improved physics awareness, explicitly mention material properties or forces at play: “wind gusts at 10 mph from the right blowing the curtains,” “wet asphalt causing light reflections,” “heavy rain droplets bouncing off the car roof.” These cues prompt the model’s physics engine to produce more lifelike interactions. Also, include small environmental details (like dust, mist, reflections) that add realism and make the scene cohesive.
Audio Cues: If you want sound, include a brief Audio section in your prompt. Indicate ambient noises, sound effects, or dialogue. Keep these concise and timed. For example: “Audio: distant thunder rumbles; soft piano music begins; a woman whispers, ‘We’re safe now.’” If there is dialogue, it’s best to format it with a speaker name and a short line (we’ll cover more under Dialogue and timing). By specifying audio elements, you ensure Sora 2’s generative audio aligns with the visuals (e.g. if you describe fireworks in the sky, also mention fireworks sound, otherwise the model might add none or mismatched audio).
Stylistic and Format Notes: You can prepend overall style guidelines such as “Cinematic 1970s film look”, “like a glossy music video”, or “in the style of a hand-painted animation”. Sora 2 can adopt various visual styles (realistic, anime, sketch, etc.), and stating this up front frames all subsequent details. Also specify output format aspects if needed (especially if using the API): for example, “Cinematic vertical video 9:16 format” if you require a particular aspect ratio or orientation. (Note that resolution and duration are controlled by parameters outside the prompt, but mentioning format context can still guide composition, such as centering action for a vertical frame).
These components can be organized clearly in the prompt, using a logical template or bullet points. Many prompt engineers find it useful to write prompts in sections (like “Scene/Setting: … / Subject: … / Camera: … / Lighting: …” etc.) or as a list of shot descriptions if multiple shots are involved. Clarity and structure in the prompt help Sora 2 parse your intent. In the next sections, we dive deeper into specific advanced strategies – temporal logic, spatial positioning, frame control, chaining, latent guidance, and consistency – which build upon this multi-faceted prompt design approach.


Temporal Logic and Sequence Control
One of Sora 2’s strengths is interpreting prompts that describe a sequence of actions or shots over time. To utilize this, you should incorporate clear temporal logic in your prompt – essentially, tell a mini story in the order it should unfold. Here are strategies for controlling time and sequence in Sora 2 prompts:
Segment Your Prompt by Shots or Beats: If you want multiple distinct actions or camera cuts in one video, delineate them clearly in the prompt text. For example, you can enumerate shots as separate paragraphs or bullet points:
Shot 1: “Wide establishing shot: a man in a red jacket enters a lobby, pushing the glass door open.”
Shot 2: “Cut to a side angle: the man walks down a hallway towards an elevator.”
Shot 3: “Close-up: his hand presses the elevator button, the button lights up.”
Each shot description should contain one camera setup and one concise action. Sora 2 will interpret this structure and attempt to produce a video that cuts or transitions through these described moments in order. Keeping each “beat” self-contained (with its own subject, action, and camera notes) helps maintain clarity. If you run the generation and the sequence feels jumbled, ensure each segment of the prompt is distinctly separated (using new lines, dashes, or numbering) so the model knows they are sequential.
Use Temporal Keywords and Order Phrases: You can explicitly use words that denote sequence or timing to help the model follow the intended order. Phrases like “then,” “as soon as,” “next,” “meanwhile,” can connect events. For example: “The astronaut steps onto the ladder, then climbs down to the ground. As her feet touch the moon’s surface, she pauses.” This tells the model two actions in order. Be careful not to string too many actions without punctuation – a run-on description is harder for the model to segment. It’s often better to break it into separate sentences or lines for each major beat.
Timeline Notation for Key Moments: An advanced technique is to include timestamp cues for when certain events or cuts happen, especially for longer clips. Sora 2’s prompt parser can recognize simple time markers. For instance, “00:00–00:05: panoramic view of city skyline at dusk; 00:05: camera cuts to street level as protagonist appears”. Or within a single shot description: “At 3 seconds, the fireworks begin exploding in the sky.” By specifying a time, you anchor that event in the clip’s timeline. In practice, you should use coarse markers (e.g. at the half-way point, or at specific seconds in an 8-second clip) for one or two key changes – don’t try to micromanage every second. The model isn’t perfectly precise, but it will attempt to honor obvious cues like something happening “in the final second” or “by 00:08.” This is particularly useful for timing dialogue or a climax in the action. For example: “At 00:07, she whispers: ‘We made it.’” ensures the line of dialogue is delivered near the 7-second mark (in an 8s clip).
Maintain Causal Logic: Make sure the sequence of events in your prompt is logically and physically plausible, because Sora 2 will generally follow that logic or fail trying. If you describe someone running then suddenly flying without explanation, the model may produce strange transitions or ignore the implausible part. But if you establish causality (even implicitly), the temporal flow will be smoother. For example: “The dam cracks and water bursts out, flooding the valley; moments later, a house is swept off its foundation by the surge.” This makes sense in order – crack causes flood, which causes house to move – and the video will likely reflect that chain of events. Always ask yourself if A leads to B in your described timeline; if not, consider adding connective tissue (e.g., “because,” “so,” or a brief cause) or splitting into separate shots.
Shot Duration and Pacing: Although you can’t explicitly set each shot’s exact length via prompt (the overall video length is fixed by the API or app settings), you can influence pacing by how you describe actions. Quick, terse descriptions will likely play out faster than detailed, drawn-out descriptions. For instance, “In one second, the car speeds by” suggests a very fast action, whereas “The car rolls to a stop over three seconds” gives a sense of slower pace. If you list multiple actions in one shot, the model has to fit them into the few seconds, which can make the pacing feel rushed or unclear. Therefore, for better temporal clarity, limit each shot to a single, maybe two, significant actions. If you need to show a longer process, consider actually generating a longer clip or splitting into sequential shots as described above.
In summary, use a structured, story-driven approach for temporal control. Breaking the prompt into an ordered list of shots or events, using clear time indicators, and ensuring logical cause-effect relationships will help Sora 2 faithfully render the progression of your scene. This level of temporal logic in prompting is one of the defining skills in advanced Sora 2 usage – effectively, you’re writing a mini screenplay that the model then interprets into continuous video.
Spatial Awareness and Scene Composition
Sora 2’s understanding of spatial relationships – where objects and characters are in relation to each other and to the camera – is greatly improved, but it still requires careful guidance from the prompt. To achieve coherent spatial layouts and avoid continuity errors in the scene’s geography, consider the following:
Explicit Positioning and Directions: Be specific about where key elements are. Instead of simply saying “A table is in a room,” anchor it: “A round table stands in the center of the room” or “to the left, a wooden table with papers on it.” Use directional words (left, right, above, in the background, foreground, near, far) to give the model a mental map. For example: “In the foreground, a tall lamp post; far behind it, the silhouette of a city skyline.” If you have two characters interacting, specify their positions relative to each other: “Alice stands facing Bob across the counter” is clearer than “Alice and Bob stand in a room.” This reduces ambiguity and helps the model maintain consistent spatial orientation from shot to shot.
Maintain a Consistent Frame of Reference: If your prompt spans multiple shots of the same scene, make sure to use consistent descriptions for the environment and relative positions. A common issue in AI-generated video is the “jumping camera” or broken 180-degree rule, where the perspective flips and it confuses the viewer’s sense of who is where. To mitigate this, anchor the scene with landmarks and avoid contradicting earlier spatial descriptions. For example, if in shot 1 you said “the window is behind the protagonist,” then in shot 2 (a different angle) you might remind the model, “camera now faces the protagonist from the front, with the window now seen in front of her.” This way, the model knows the window is a consistent element and can place it correctly even as the viewpoint changes. If you simply omit mention of the window, the model might introduce or remove elements arbitrarily, breaking spatial continuity.
Camera Perspective and Spatial Cues: The camera instructions in your prompt are crucial for spatial awareness. Indicating the camera angle implicitly tells the model how to arrange the scene. For instance, “over-the-shoulder shot from behind Alice looking toward Bob” ensures that the model places Alice’s shoulder or back in the foreground and Bob in front of her in the scene. Likewise, “bird’s-eye view of the market” signals a top-down layout of stalls and people. Use these cinematic perspectives to your advantage – they not only set a stylistic tone but also clarify spatial relationships. If a character moves, describe it relative to the scene: “he walks from the doorway on the right toward the desk at center” is spatially richer than “he walks to the desk.”
Depth and Distance Descriptions: You can guide the model on what should be in focus versus what is in the distance. Terms like “foreground”, “background”, “in the distance”, “close-up on” help allocate attention in the frame. For example: “In the background, blurred traffic lights twinkle” combined with “in the foreground, a sharp focus on the musician’s hands playing the guitar” instructs Sora 2 to compose the shot with depth of field – the musician’s hands are close and clear, the city lights are far and likely out of focus. Sora 2 can handle depth-of-field cues if you explicitly mention focus and distance (e.g. “shallow depth of field: the subject’s face is sharp, everything behind is bokeh-blurred”).
Preventing Spatial Confusion: If you notice in test outputs that objects appear to jump around or characters swap positions unexpectedly, you may need to simplify or reinforce spatial language. One cause of such issues is overly complex camera movement or too many subjects introduced at once. It might help to lock the camera for a shot (e.g. “static wide shot”) if movement was causing spatial drift. Also verify that you haven’t inadvertently introduced ambiguity: for example, re-using pronouns like “he” or “she” across multiple people can confuse the model. Name them or give distinct labels (even generic ones like “the guard” vs “the visitor”) so spatial actions tie to the correct entity.
Examples of Strong Spatial Prompting: “The detective stands by the fireplace on the left, while the suspect sits on a sofa to the right. A coffee table is between them. Camera is a wide shot facing both characters, keeping the detective on the left side of the frame and the suspect on the right.” – This prompt clearly establishes the spatial layout and even tells the camera framing to maintain that left-right relationship. The resulting video is far more likely to respect those positions through the scene.
Another example: “A drone shot pulls back over a forest: in the foreground, tree branches move past the camera, revealing a clearing below where two hikers walk.” – Here we combined spatial layering (foreground branches vs clearing below) with camera motion. The model will try to produce parallax (near objects moving faster than far ones) creating a convincing spatial depth effect.
In essence, spatial awareness in Sora 2 prompting means leaving as little to guesswork as possible about the scene’s geometry. By clearly stating where things are and how the camera views them, you guide the model to produce stable, sensible layouts and avoid the disorienting spatial jumps that can occur without guidance. The payoff is a video that feels intentionally staged rather than randomly arranged.
Specifying camera lenses and angles influences spatial composition. In the frames above, the prompt dictated a medium close-up shot with a 50 mm lens and neon nighttime lighting. The result is a consistent perspective focusing on the subject, with the background context blurred but present. By contrast, a wide-angle (24 mm) would capture more of the surroundings with greater depth. Prompt engineers should choose framing and lens cues appropriate to the spatial story: a telephoto lens (e.g. 85 mm) for isolating a subject vs. a wide lens for encompassing environment.
Frame Control Techniques
While Sora 2 does not yet allow manual editing of every single frame, it offers various ways to control the structure and key frames of your video through prompting and settings. “Frame control” in this context means influencing how the video starts, ends, and transitions, as well as how it can be split or combined with other clips. Here are advanced techniques and considerations for frame-level control:
Leveraging Start and End Frames: You can guide the first frame of the video explicitly using an image input (the “input_reference” in the API). By supplying an image that matches your scene or style, you lock in the starting visual state. Sora 2 will treat that as the initial frame and then animate from there according to your prompt. For example, if you have a specific character design or background you want, generate or draw an image of it and use it as the anchor; then your prompt can say “the scene comes to life” or describe motion continuing from that frame. This is an extremely powerful form of frame control because it fixes the model’s starting point in the latent space. The rest of the video will try to remain consistent with that starting image. On the flip side, if you want the video to end on a particular look or frame, there isn’t a direct parameter for an end image in Sora 2 yet. However, you can approximate this by designing your final shot in the prompt to match a known image or state, or by generating the video in segments (more on chaining below). If continuity into the next video is important, consider capturing the last frame of one clip and using it as the start frame for the next clip’s generation.
Storyboard Mode and Keyframe Notation: The Sora app’s Storyboard interface allows creators to specify important frames by timestamp – essentially a GUI-assisted way to do what we described with timeline markers. In pure prompting, you emulate this by the timeline notation technique. For instance, including “00:10 – cut to black” or “Fade out at 4 seconds” communicates how you want the video to conclude. While the model might not execute a perfect cinematic fade, it will often respect an instruction like ending on a particular image or action. For example: “In the final frame, the hero’s silhouette is centered against the sunset” gives a target for the end of the clip. Use such phrasing sparingly and clearly (end of clip, final moment, etc.). This is as close as you get to controlling the last frame via prompt. It’s wise to pair it with starting frame control if doing multiple clips, to ensure a smooth cut.
Controlling Cuts and Transitions: By default, if you describe multiple shots in one prompt, Sora 2 will cut between them as per the description (usually hard cuts). If you want a specific transition style, you can attempt to describe it (e.g. “Shot 1 …; transition: crossfade into Shot 2 …”). The model may or may not cleanly execute a crossfade, but it might attempt a milder cut or a blended scene. In practice, if you require a polished transition (fade, wipe, etc.), it’s usually better to handle it in post-production editing by generating two separate videos and crossfading them externally. However, you can enforce a smooth camera move instead of an abrupt cut by writing the prompt as one continuous shot with a camera motion. For example: “Camera starts wide on the valley, then seamlessly cranes down to focus on the riverbank where the child plays”. The model will generate that as one unbroken shot (if it can manage it), effectively giving you an in-camera transition. This is a form of frame control via continuous movement rather than an actual edit.
Frame Rate and Motion Timing: Sora 2 videos have a default frame rate (often around 24 or 30 fps, similar to film). You cannot directly set the frame rate via prompt – it’s fixed by the model. But you can influence how motion appears between frames by the way you describe speed and smoothness. If you want very crisp, slow-motion-like action, describe the motion as slow and deliberate, and mention maybe a high-speed camera effect (though actual high FPS slow-mo might be outside current model ability). Conversely, if you want something to happen with rapid, jittery energy, you might describe it in quick beats or use words like “suddenly” or “with rapid staccato motions”. These qualitative cues affect how the model distributes changes frame-to-frame. Additionally, keep in mind the shutter speed concept: Sora 2 understands phrases like “motion blur” or “staccato shutter (e.g. 180° shutter)”. For instance, “fast shutter, crisp frames with no motion blur as the car races past” could result in sharper frame-by-frame action, whereas “long exposure blur on moving elements” might simulate motion blur. Use such cinematic technical terms only if you are confident in their effect – the model was trained on a lot of film description, so it does respond to them, but testing is key.
Shot Length and Number of Shots: The length parameter (seconds of video) you set in the API or app will constrain how many distinct shots you can realistically fit. As a rule of thumb, a 4-second video is best for a single focused shot or two very short shots; an 8-second video might accommodate 2–3 shots; 12 seconds maybe up to 4–5 shots. Pushing more than that can make each segment too fleeting. Plan your prompt’s shot list accordingly. If you truly need more shots or more complex sequencing, consider splitting into multiple clips and chaining them (prompt chaining is covered in the next section). This approach actually gives you more frame control because each segment can be fine-tuned and even re-generated independently, then edited together. Many advanced users prefer generating, say, three 4-second videos rather than one 12-second video for exactly this reason – it’s easier to control and refine each piece. The downside is you must maintain continuity manually (by reusing descriptions or reference images across those prompts).
Keyframe Re-rendering: A clever manual trick some prompt engineers use: generate a video, extract a frame from it (maybe the middle or a problematic moment), and then use that frame as an input image for a new generation or a remix, adjusting the prompt to “fix” something. This way, you re-initialize the latent state at a specific frame and can try to steer it differently from that point onward. For instance, if everything was good until a weird artifact at the end, you can take the last clear frame before the artifact and tell Sora 2 (via an image anchor) to continue from there with a slightly altered prompt that hopefully avoids the artifact. This is experimental and requires the API plus editing work, but it highlights a broader point: frame control can sometimes mean doing multiple passes. Sora 2’s remix feature essentially does this under the hood – it takes your previous output as an implicit starting point and applies the new prompt modification. Use remix in the app to iteratively lock certain frames and change others (e.g., “same shot, but now with the door closed at the end”). It’s not deterministic frame editing, but through iteration you can converge on the precise framing you want in each moment.
In short, while you can’t dictate every frame explicitly to Sora 2, you have many tools to shape the video’s frame-by-frame progression: starting from a fixed image, structuring the prompt timeline, controlling how shots begin and end, and smartly splitting complex sequences into manageable pieces. By thinking ahead about how your video should open, transition, and close – and using the prompt (or the app’s storyboard tools) to communicate that – you exert a high level of frame control to achieve professional-looking results.
Prompt Chaining and Multi-Prompt Workflows
Prompt chaining refers to using multiple prompts in sequence to create a longer or interactive narrative, rather than trying to get everything in one single prompt output. Sora 2’s ability to maintain continuity across shots makes it feasible to plan multi-part videos and even branched storylines by chaining generations together. Here’s how to approach chaining in a prompt engineering context:
Creating Multi-Scene Stories: If you have a storyline that spans several scenes or locations, it’s often wise to break it into separate prompts/videos (like scenes of a film) and then stitch them together in post-production. For example, you might generate Scene 1 (e.g. “the hero’s intro in village”), then Scene 2 (“encounter in the forest”), then Scene 3 (“climax at the castle”). Each prompt can re-state the necessary context to ensure consistency (character appearances, relevant props) because once you start a new generation, the model doesn’t have memory of previous outputs unless you feed it in. This is where using image references between scenes is useful: you can take a representative frame from Scene 1 and feed it as the image input for Scene 2’s generation to carry over visual style or characters. Alternatively, ensure your prompts use the same descriptive phrases for recurring elements (e.g. always call the hero “a tall woman with a scar on her left cheek wearing medieval knight armor” in every scene’s prompt). This manual consistency check is crucial for prompt chaining to look cohesive.
User Interaction and Branching: In interactive applications (like choose-your-own-adventure stories or game engines), you can chain Sora prompts in response to user choices. For instance, initial prompt generates an opening scenario. Then, based on user input (“take the left path” vs “take the right path”), you craft a follow-up prompt that starts from the state of the last scene and goes in the chosen direction. Because Sora 2 can only generate a fixed-length clip at once, each segment’s prompt must recap enough context. A follow-up prompt might begin with a brief recap: “Continuing from the previous scene, the knight now enters the dark cave…” and then introduce the new developments. Overlaps in description (like the knight’s appearance, the fact it’s night, etc.) ensure the model matches the previous clip’s look. Essentially, each prompt in the chain acts like a chapter that begins where the last left off. Keep some tokens of continuity (time of day, character descriptors, ongoing background sounds) to smooth the transition.
Remix and Iterative Refinement: Prompt chaining isn’t only for long narratives – it’s also a technique for refining a single scene through multiple passes. As mentioned earlier, Sora 2’s Remix feature in the app allows you to take a generated video and apply a new prompt tweak to it, resulting in a variant that preserves much of the original content. This is a form of intra-scene chaining: your first prompt produces a draft, then you “chain” a second prompt that says “same scene, but adjust X or Y.” For example, you generate a clip and the motion is good but the lighting is too dark – you can Remix with a prompt that adds “increase brightness of scene, more fill light” while keeping everything else identical. The model then regenerates the video, starting from the original as a base (so continuity is retained), but guided by your new instruction to change the lighting. This process can be repeated in steps (change one thing at a time) until you have a result that meets all your criteria. Prompt engineers should embrace this iterative chaining mindset instead of expecting one prompt to nail it all – Sora 2, like a human production, may require a few “takes.”
Chaining Micro-Elements (Compositing): Another advanced use is generating elements separately and compositing. For instance, if Sora cannot get two complex actions perfect in one go, you might generate one clip with Action A happening, and another clip with Action B (perhaps on green screen or a neutral background), and then overlay them. Prompt chaining here involves designing prompts that produce assets to be combined: one prompt for a background plate (scenery or establishing shot), another prompt for a character performing an isolated action (e.g. a dancing figure on black background), then using video editing to layer them. While this drifts into video FX territory beyond pure prompting, it’s a viable workflow, especially since Sora 2 can produce transparent backgrounds or high-contrast cutouts if guided (for example, “on a solid black stage, a dancer performs…” can give you a figure that’s easier to mask out). So, you chain prompts to create components of the final video.
Automating Prompt Chains: If you find yourself doing a lot of sequential prompting, consider scripting it via the API. For example, you could programmatically feed the last frame of clip 1 as the reference for clip 2 and so on. Some community tools (like orchestration frameworks or workflow automation software) allow building flows where one AI output feeds the next prompt. The CometAPI integration and similar services have been used to set up dynamic prompt chaining pipelines – e.g., a user’s text input generates an initial scene with Sora, then another service analyzes that output or user input to produce the next prompt, calling Sora again for the next scene, assembling on the fly. While this is advanced and requires careful planning (and likely some coding), it highlights that Sora 2 can be part of a larger chain of generative tasks.
When employing prompt chaining, always keep an eye on continuity between segments. Before generating the next link in the chain, review the last output: note character appearances, lighting, key events, and make sure the next prompt accounts for them. If the hero had a torch in her hand at the end of the last video, the next prompt should mention that torch still being there (unless you explain it was dropped). These little details are what make chained prompts feel like one continuous story rather than unrelated clips.
In summary, prompt chaining allows you to build complex narratives or interactive experiences with Sora 2 by treating each generation as part of a sequence. It grants you flexibility – you’re not constrained by the 4–12 second window for everything. Instead, you direct a series of shorter “scenes” and piece them together. This modular approach aligns well with professional workflows (shooting scene by scene) and gives you opportunities to correct course along the way, leading to a more polished final video.
Latent Guidance and Visual Conditioning
“Latent guidance” in the context of Sora 2 refers to guiding the model’s underlying generative process using additional inputs or constraints beyond the raw text prompt. Sora 2 is a latent diffusion model under the hood, which means we have some ability to influence its latent space for more control. Here we discuss how to use visual conditioning, reference inputs, and other latent-level tricks to get the output closer to your vision:
Image Reference Inputs: One of the most direct ways to guide the latent generation is by providing an image as a reference. As mentioned earlier, Sora 2 allows an input_reference image that the model will use for the first frame (and overall style cues). This effectively “pins” many latent attributes – composition, character look, color scheme – to match that image. Use cases include:
- Stylistic guides: If you want the video in the style of a particular painting or cinematography, you can feed an image (or frame) with that style. For example, an illustration or frame from a movie that has the color grading or design you want.Character or object guide: You can introduce a specific face, person, or object via an image so that Sora replicates it in the video. The cameo feature is essentially this – you provide a short video or images of a person (yourself, an actor) to condition the model. The prompt should then describe that character doing something, and the model’s latent space is biased to include that person’s likeness and voice.Layout guide: If a precise scene layout or pose is needed, you could sketch or roughly render it, then use that as input. For instance, you might position key elements in an image (even a crude 3D render or photo) – maybe a monster on the left and a hero on the right – and then prompt Sora to animate it: “The hero on the right raises their sword, the monster on the left roars.” The output should follow the composition of the reference but animate according to the prompt.
Latent Consistency via Remix/Seed: While Sora’s public API doesn’t yet expose a random seed parameter (for reproducibility or manual latent tweaking), advanced users have found workarounds for latent consistency. One method is to use the Remix feature or an internal seed-lock by duplicating a job ID (in Azure’s API preview, for example, you can sometimes fix a seed by reusing a draft video as the basis for variations). If you have access to such features, leveraging them ensures that changes in prompt don’t entirely reshuffle the scene’s latent composition. Essentially you keep the same underlying noise pattern and just nudge the generation. For prompt engineers, the practical takeaway is: when you find a promising output, lock it in and iterate from it rather than generating from scratch each time. This retains a lot of the latent structure. Using the same reference image or cameo consistently is another way to keep the latent space steady between runs – it’s like providing the same initial condition each time.
Embedding Structured Metadata in Prompts: Some community experiments involve embedding pseudo-structured data within the text prompt to indirectly guide the model’s latent attention. For example, adding a JSON-like snippet that summarizes the scene: json{ "location": "beach", "time": "sunset", "characters": 2 }. The idea is the model might parse this as a strong signal about the scene composition. While this isn’t officially documented, there are anecdotal reports that such tricks can sometimes reduce ambiguity (the model might treat it like a caption it needs to satisfy). Use this with caution – it can also confuse the model if not done cleanly. Another trick is using delimiters or headings in the prompt (like writing Scene: ... Camera: ... Action: ... explicitly). We’ve effectively done that in our structured prompts, which is a more human-readable way to do the same thing. It’s about guiding the model’s internal representation by clearly delineating each aspect.
Control Over Latent Motion vs. Content: Sora 2’s architecture separates (to some extent) the what (spatial content in frames) from the how it moves (temporal evolution). While users cannot directly manipulate latent motion vectors, you can indirectly influence them via prompt wording. For example, describing motion in a deterministic, measured way (like “takes four steps” or “raises hand slowly”) guides the latent motion to be more linear and consistent. Describing motion vaguely or chaotically may lead the latent trajectory to wander, causing jitter or continuity issues. So, for latent guidance, focus on stable descriptions if you want stable latent evolution. If you want the model to inject some randomness or surreal transformation, you might deliberately leave the path open (e.g. “and then something unexpected happens” – though unpredictable, this invites the model’s latent creativity).
Using Negative Guidance (Exclusions): Another form of latent guidance is telling the model what not to include, which prunes certain latent possibilities. Sora 2 doesn’t have an official “negative prompt” parameter like some diffusion-based image generators do, but you can achieve a similar effect with descriptive negation in your prompt. For instance, appending a line like “No text or captions on screen. Avoid lens flare.” can steer the latent solution away from putting random text artifacts or excessive flare effects. Similarly, “no other people around” might help avoid crowd artifacts if you only want one person. These negative cues function as constraints that shape the latent space by removing some options. They should be used sparingly and phrased as natural language (the model was trained on text, so it understands “avoid” or “no X” in context). Be aware that overloading negatives can sometimes backfire (the model might fixate on the concept you’re trying to avoid), so only include a few high-impact exclusions. In summary, by stating undesirable outcomes, you indirectly guide the model’s latent sampling away from those features.
Harnessing Pre-trained Latent Knowledge: Sora 2 was built on top of a powerful text-to-image model and then trained to extend images into video. This means the model carries a lot of latent knowledge from the image domain (like CLIP embeddings and such). For prompt engineers, this implies that many techniques known from image generation still hold value: e.g., referencing artists or styles, using certain keywords that trigger specific aesthetics (“cinematic lighting”, “HDR”, “bokeh”, “analog film grain”) all influence the latent style. While these are text-side controls, they operate by pushing the latent representation towards known feature distributions. Thus, they are part of “latent guidance” too. Don’t shy away from inserting a style modifier or two to pin the look – just ensure it doesn’t conflict with your main scene description. For example: “80s VHS home video style” could be tacked onto a prompt if you want that lo-fi latent texture.
By combining these approaches – reference images, iterative seed reuse (via remixing), structured prompt cues, and selective negative constraints – you gain a degree of mastery over the normally hidden latent variables. Visual conditioning is arguably the most impactful of these, as it bridges the gap between what you imagine and what the model creates. When you need absolute specificity (like a branded product or a real person’s face in the video), the only way is to condition on an actual image of that. Latent guidance tools will likely expand in the future (e.g. OpenAI or others might introduce something akin to ControlNet for video, handling depth maps or motion paths), but even today, Sora 2 offers a rich playground for those willing to experiment with guiding the generation beyond plain text.
Ensuring Animation Consistency and Coherence

One of the hardest challenges in text-to-video generation is achieving animation consistency – making sure the video is not only individually believable frame by frame, but also coherent across time. Sora 2 improves the odds of consistent output with its advanced training, but prompt engineering and technique still play a critical role in avoiding jarring flicker, morphing subjects, or other temporal artifacts. Here’s how to maximize consistency:
Maintain a “Style Spine”: Use a consistent stylistic thread throughout your prompt. This means if you choose a certain cinematic style, color palette, lens type, etc., try to hold those constant across the whole prompt (or across all prompts in a chain of videos). For example, if you start with “gritty 16mm documentary look” and a muted palette, don’t switch suddenly to “glossy Marvel blockbuster vibe” in the next shot unless the change is intentional. Sora 2 will strive to apply the style globally, so introducing a conflicting style mid-prompt can cause inconsistency. A style spine could include the same lens family (say all shots use 35 mm and 50 mm lenses, not jumping to fish-eye suddenly), the same lighting motif (e.g. warm key light + cool fill throughout), and similar film grain or color grading notes. This way, even if the content changes, the viewer’s eye perceives it as one continuous piece.
Re-use Descriptions for Key Elements: When you have a main character or important object that appears in multiple shots, describe it in nearly identical wording each time. For instance, if your protagonist is described as “a young woman with short curly black hair and a blue coat” in the first shot, do not call her *“the girl” with no details in the next – repeat “the young woman with short curly black hair” in subsequent shots to remind the model. This reduces the chance that the model might unintentionally change her hair length or coat color later. Consistency of language leads to consistency of visuals. This extends to props and locations too: *“the red vintage car” should be referred to exactly as that later, not just “the car,” if you want it to stay red and vintage. (The model could decide a generic “car” is a different one). Essentially, you act as the script supervisor for continuity via the prompt text.
Limit Surprises and New Elements Mid-Video: Avoid introducing entirely new major elements late in the prompt that weren’t hinted at earlier. If in the final second of a 8s clip you suddenly mention “a dragon appears,” the model might struggle and either flicker it into existence or distort something to morph into a dragon. If a dragon needs to appear, it’s better to set it up earlier (even off-screen: e.g. “distant roar of a dragon is heard,” so the model has context that a dragon exists) and then reveal it. In general, new content should be introduced at shot boundaries, not in the middle of a continuous shot. This way, the model can treat each shot as a consistent unit. If using multi-prompt chaining, you have more freedom to add new elements in a new scene (since it’s a fresh generation), but within one clip, consistency means not overloading it with too many evolving pieces.
Watch for Common Artifacts: Sora 2 mitigates many issues but you might still encounter things like:
- Mild flicker or lighting shifts: If frames visibly flicker (especially background or exposure flicker), your prompt might have conflicting lighting cues or the model is uncertain. Fix by simplifying and unifying the lighting description (e.g. “all shots are under steady midday sun” or “constant lighting throughout”). Consistent phrasing like “stable lighting, no sudden brightness changes” can even be added as a hint.
- Inconsistent lip-sync: If you have characters speaking, keep their lines short and allow time for the mouth movements. If one clip has two people talking over 4 seconds with long sentences, the model might not animate the mouths accurately or one might continue flapping after the line. To ensure consistency, have at most one or two lines in a 4s clip, or use an 8s clip for a fuller dialogue exchange. Also indicate pauses if needed: e.g. “[pause]” or use ellipses to show a beat of silence. If the sync still misses, plan to adjust in post (you can always overlay actual audio later).
- Morphing or duplicating objects: Sometimes an object can change shape or a person might seem to duplicate (like an extra arm or an extra person pops in) due to model uncertainty. This often happens if the prompt was ambiguous or tried to enforce something unnatural. To avoid this, double-check that you’re not asking for something contradictory (e.g. “the man stands alone” and later “crowd surrounds him” in the same continuous shot – this might confuse the model’s latent scene composition). If duplication occurs, adding a negative constraint like “no extra people” or breaking the action into two shots (first he’s alone, then cut, then crowd appears) might solve it.
- Maintaining focus on the important subject: If the model sometimes drifts focus to something else (perhaps an unimportant background element comes to the fore), it could be that the prompt spent too many words on that background. Make sure the prompt spends the most detail on what is important to see. Minor elements can be mentioned briefly or in broad strokes, whereas the hero or main action should have detailed descriptors. This “attention budgeting” in the prompt will guide the model’s attention similarly, leading to consistent focus.
Use Post-Processing for Perfection: Even with careful prompting, tiny inconsistencies might slip through (a minor color shift, a slight off-model frame). Professional prompt engineers treat the output as material that can still be post-processed. Running a deflicker filter on the video can eliminate small lighting jitters between frames. You might also consider generating at a slightly higher frame rate or longer duration than needed, then slowing down or trimming the best part. If continuity of a character’s position is an issue at a cut, sometimes generating an overlapping segment can allow a smoother crossfade in editing. While this goes beyond prompting itself, it’s part of the overall workflow to achieve consistency: you use Sora 2’s strengths (quickly generating content and motion) and then correct its weaknesses (minor continuity errors) with traditional tools.
Test and Refine: Consistency often becomes an issue only when you see the video play back. It’s hard to anticipate all continuity problems in text. Therefore, an iterative approach is key: generate a preview at lower resolution or shorter length to sanity-check consistency. If the physics look odd or something flickers, adjust the prompt or settings and try again before committing to a final render. Each iteration teaches you about how the model interpreted your prompt. For example, you notice the background crowd was static like cardboard cutouts – next prompt you might add “background extras move naturally, not frozen.” Or a character’s outfit changed color – next iteration you explicitly restate the color in each shot description.
By rigorously applying these consistency techniques, you guide Sora 2 to produce video outputs where all elements harmonize over time. The goal is to have the viewer feel like the video was shot with a real camera in a coherent world, rather than assembled by an AI frame-by-frame (which can show seams if not handled well). With practice, prompt engineers learn to anticipate what descriptions yield stable animation and what tends to introduce instability. Sora 2 rewards this attention to detail by significantly reducing the notorious glitches of earlier video models, as long as the prompt provides a steady blueprint.
Troubleshooting Undesired Outputs
Even with advanced techniques, you may occasionally get outputs that aren’t what you wanted – strange artifacts, ignored instructions, or other quirks. Here is a quick troubleshooting guide for common Sora 2 prompt issues and how to mitigate them:
Model ignores a specific instruction: If Sora 2 consistently overlooks a detail (for example, you said “the sign on the wall reads ‘Cafe’” and it produces gibberish text, or you asked for a character to smile but they remain stoic), it could be due to model limitations or the phrasing. First, check if your prompt is too overloaded – maybe that detail got lost among others. Emphasize it by giving it its own sentence or line. “Important: the character smiles at the end” could nudge the model. However, certain things like legible text on signs are inherently hard for the model (it’s not great at generating readable text in video frames). In those cases, the workaround is to avoid relying on the model for that – e.g., don’t try to have it render specific text onscreen; instead plan to overlay it later or use a symbol. You can also explicitly instruct “no legible text” to avoid the gibberish, as the model then will just make it blank or abstract.
Camera motion is too chaotic or scene is “too busy”: If the resulting video has a camera that’s whipping around or too many things happening (causing confusion or nausea), simplify the prompt’s camera instructions. Sora 2 does best with one clear camera movement per shot. If you accidentally described multiple (e.g. “camera dollies forward and pans and tilts up all at once”), break that down or choose the most important motion. You might change “dynamic handheld running behind the character” to “steady follow shot behind the character” for more stability. Removing conflicting verbs (like you might have said “the camera circles around and zooms in” – that can conflict) will help the model choose a single path. If needed, opt for a static shot if the movement isn’t critical; you can add motion in post by slight zoom or pan on the video.
Lip-sync or dialogue timing is off: This can happen if a line is too long or the action in the scene doesn’t give enough time for it. Solution: shorten the dialogue or break it into two shots (one per line). Also ensure each speaker’s line is separate and maybe include an implicit pause. For example, instead of "Alice: "We should leave now, it’s dangerous." Bob: "I agree, let’s go." all in one 4s prompt, split into two shots or use an 8s clip. If exact sync is critical (for a project where you’ll overlay real voice later), it’s often acceptable to get the visual close enough and then do a manual audio alignment. At least Sora 2 will animate the mouths when given dialogue; if it’s not perfect, re-recording audio with proper sync is an option (ADR in filmmaking terms).
Unwanted text, logos, or UI artifacts in visuals: Sometimes the AI might produce random text or shapes that resemble watermarks, especially in scenes with signage, screens, or if the prompt was artistic (it might include signature-like squiggles). To combat this, use descriptive negation: e.g. add “no visible text or letters in the scene” at the end of your prompt. If a character is looking at a phone or book and you want content on it, understand that Sora can’t generate readable text – better to keep it indistinct. If brand logos appear (maybe you said “a soda can” and it drew a Coca-Cola-like logo), that might even be filtered for IP reasons. So it’s best to say “a plain unlabeled soda can” to explicitly avoid real logos. When in doubt, keep the scene free of detailed writing and add any needed graphics in post-production.
Physics oddities (e.g. feet not touching ground, objects clipping): If you see things like a character’s foot sliding instead of staying planted, or an object passing through another, refine the physics description. Sora 2 has a physics engine aspect but it may need hints. For the foot example, you could add “with realistic contact and friction on the ground (no slipping)” to the prompt. If water or particles behave oddly (e.g. water floating), include more context: “water behaves naturally, falling downward with gravity”. Also sometimes simplifying camera perspective helps – a weird artifact could be the model struggling with 3D perspective. Changing “extreme low angle” to a more neutral angle might remove the oddity. If complex interactions still look wrong, consider not showing them explicitly – e.g. cut away before the foot contacts ground, if the landing frame was always off. In a multi-shot approach, you can avoid the moment that causes the artifact.
Flicker or exposure “pumping”: This refers to slight changes in brightness or color from frame to frame, like the auto-exposure of a camera going haywire. If you notice flicker, ensure your lighting instructions are consistent and not contradictory. Phrases like “stable lighting throughout” or specifying the type of exposure can help (e.g. “camera set to manual exposure” as a metaphor). If flicker persists, it might be inherent for some difficult scenes (especially ones with lots of flashing lights like neon signs). For final outputs, applying a deflicker filter using video software can smooth these out. You can also try re-generating with a different random seed (just re-run the prompt) – sometimes one generation has flicker, another is clean, due to the randomness in latent sampling.
Over-saturated or weird color cast: If the colors come out wildly different than imagined (maybe too neon or everything turned purple), check if your prompt accidentally implied that (did you mention a colored light source or a style that does that?). If not, you can correct course by constraining the palette in your prompt: “Color palette: natural earthy tones, nothing neon or overly saturated.” Or for a specific fix: “reduce purple tint, keep colors realistic.” The model will usually respond to direct color instructions. When grading is important, another approach: intentionally request a neutral output (daylight balanced, or flat log color profile style) and plan to color-grade the video yourself after generation. For instance: “flat color profile, no heavy color grading” could yield a more muted base that you can tweak externally.
Content Safety or Policy Rejections: If your prompt ventures into disallowed territory (violence, adult content, political, etc.), the model or platform might refuse or alter the output. As a prompt engineer, you should design queries that stay within guidelines – sometimes rephrasing helps if a benign scene was falsely flagged. But never try to coerce the model into truly forbidden content; aside from ethical issues, it won’t work and could jeopardize your access. If you hit a content filter block for borderline cases (say, a horror scene with violence), you might need to tone down explicit words and rely on implication. E.g., instead of “blood on the floor”, you could say “a pool of red liquid on the floor” – subtle wording can sometimes pass muster while still conveying the image.
When things go wrong, systematically adjust one aspect at a time and iterate. Change too many variables and you won’t know what fixed it. Experienced users keep a prompt log where they note what modifications were made and what the outcome was, almost like debugging code. Over time, you’ll amass a personal playbook of what to do when Sora shows a given quirk.
Finally, remember that some issues might not be fully solvable with prompting alone – that’s when incorporating traditional video editing or simply re-shooting (re-generating) the scene from scratch with a different approach is the practical solution. Part of prompt engineering at this level is knowing when to fight the model and when to work around its limitations. Sora 2 gives a lot of creative freedom, but it’s still an AI with certain blind spots. With the troubleshooting tips above, you can eliminate most common problems and achieve a result that meets professional standards.
Sources Overview
- OpenAI Cookbook – “Sora 2 Prompting Guide” (Oct 2025). Official guide by OpenAI staff on crafting video prompts, covering prompt structure, shots, and examples.
- OpenAI Announcement – “Sora 2 is here” (Sept 2025). Blog post introducing Sora 2, describing its new capabilities (physics realism, multi-shot, audio, cameos) and differences from the original Sora.
- Skywork AI Blog – “From Prompt to Video: Best Practices for Authoring Prompts in Sora 2” (Oct 2025 by Andy). In-depth article on writing cinematic shot list prompts, iterative workflow, and advanced techniques (negation, multi-shot consistency, etc.).
- Skywork AI Blog – “Top 12 Sora 2 Prompting Tips Every Video Creator Should Know” (Oct 2025 by Andy). Highlights tips on cinematography cues, physics, audio scripting, prompt iteration and avoiding undocumented controls.
- Skywork AI Blog – “Sora 2 Hacks (2025): Unlocking Hidden Tricks for AI Video Enthusiasts” (Oct 2025 by Andy). Covers expert techniques like physics-aware prompting, continuity chaining, storyboard-based prompting, audio beat timing, batch iteration, and compliance considerations.
- DataCamp Blog – “Sora 2: Examples, Critiques, and Early Impressions” (Oct 2025 by M. Libowitz). Review of Sora 2’s performance with example outputs; discusses continuity improvements and remaining challenges in spatial coherence and style flexibility.
- CometAPI Guides – “How to Prompt Sora Effectively” (2025, CometAPI). Community Q&A style guide with practical questions, including prompt chaining for dynamic narratives, using JSON metadata in prompts, and integrating Sora via API in workflows.
- OpenAI Help Center – “Getting Started with the Sora App” (2025). Documentation on using Sora’s app interface, including the storyboard mode and cameo setup, which informs how certain prompt features (like dialogue formatting or frame selection) function.